I am Heidi and I blog over at trying it out. I used to be a junior high math teacher, until I had my first daughter, who is now four. I also have a 22 month old daughter and a pretty great husband (most the time anyway :) ). I love to create, but I am not creative. Fortunately I have the rest of the blogging world to inspire me, and I often use their help to make something. I am too independent to ask someone to teach me, so I learn by trial and error, often more error. I just like having a place to keep track of all the things I make, and my progression. This is my first time being featured, and I am pretty excited about it, Thanks Amanda for giving me a chance, and for always helping me find more inspiration
Car Seat cover
add a strap
Nursing Cover
You will need: one yard of front fabric (I used cotton quilting fabric)
one yard of back fabric (I used Chenille)
scraps of wool felt-optional (for flower)
Velcro (the sew on kind, not the sticky kind, it will gunk up your machine)
basic sewing tools (thread, scissors, pins, etc)

one yard of back fabric (I used Chenille)
scraps of wool felt-optional (for flower)
Velcro (the sew on kind, not the sticky kind, it will gunk up your machine)
basic sewing tools (thread, scissors, pins, etc)

Cut both pieces about 35 inches wide, give or take (forgive me, I decided to do the tutorial after finishing, so all my pictures are of the finished product, not during the process)
and about 43 inches long
using a bowl, plate, or something round, round the edges of your fabric
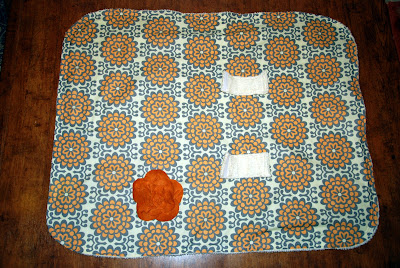
sew the flower on. I used leftover felt from this and followed to same general steps, just making it smaller
then sew the two pieces together, wrong sides together, leaving a space for turning
turn right sides out and top stitch (I did three rounds of top stitch, because I liked the look of it. You could do one or two)

now make the straps for attaching to the car seat

I sewed to rectangles of chenille together measuring about 3.5" by 7.5". I sewed them right sides together, then turned them right side out and top stitched. I repeated for the second strap.

Then I sewed Velcro on, so it could wrap around the car seat handle. Make sure you place the Velcro on opposite sides, so it can wrap flat

it will Velcro closed like this
Then I sewed the straps on (I did two seams down the center to attach each strap)

if you enlarge this picture, you will see the straps are about 13" down from the top
and about 21 inches up from the bottom (yours do not have to be exact)
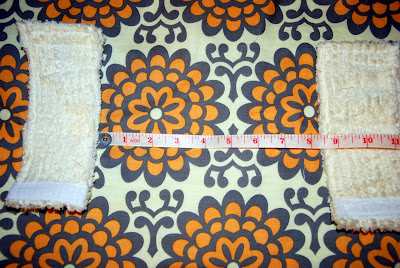
place them about 10" in on either side
and about 8 inches apart
now make the strap, for the nursing cover

I sewed two rectangles right sides together, measuring 25.5"x3.5" and turned them right sides out. Then I top stitched around
now you are done
if you feel inclined, embellish a cute burp cloth to go with it (I just used scrap fabric, some leftover lace hem tape, and some lace. The lace came on a spool and so it already had a tendency to roll. I just stared a circle on the outside, and rolled it in to the center)
Did you know that My Vinyl Designer offers FREE downloads of some of their designs? Go check them out!!


No comments:
Post a Comment