Showing posts with label Gabes Gifts. Show all posts

Tuesday, May 24, 2011

Blanket Tutorial - Car Seat Cover

Here's Heidi!  I just love her blog Trying it Out!  And she's so sweet!  Make sure to stop by and tell her hello!!

I am Heidi and I blog over at trying it out. I used to be a junior high math teacher, until I had my first daughter, who is now four. I also have a 22 month old daughter and a pretty great husband (most the time anyway :) ). I love to create, but I am not creative. Fortunately I have the rest of the blogging world to inspire me, and I often use their help to make something. I am too independent to ask someone to teach me, so I learn by trial and error, often more error. I just like having a place to keep track of all the things I make, and my progression. This is my first time being featured, and I am pretty excited about it, Thanks Amanda for giving me a chance, and for always helping me find more inspiration


Car Seat Cover/Nursing Cover Tutorial
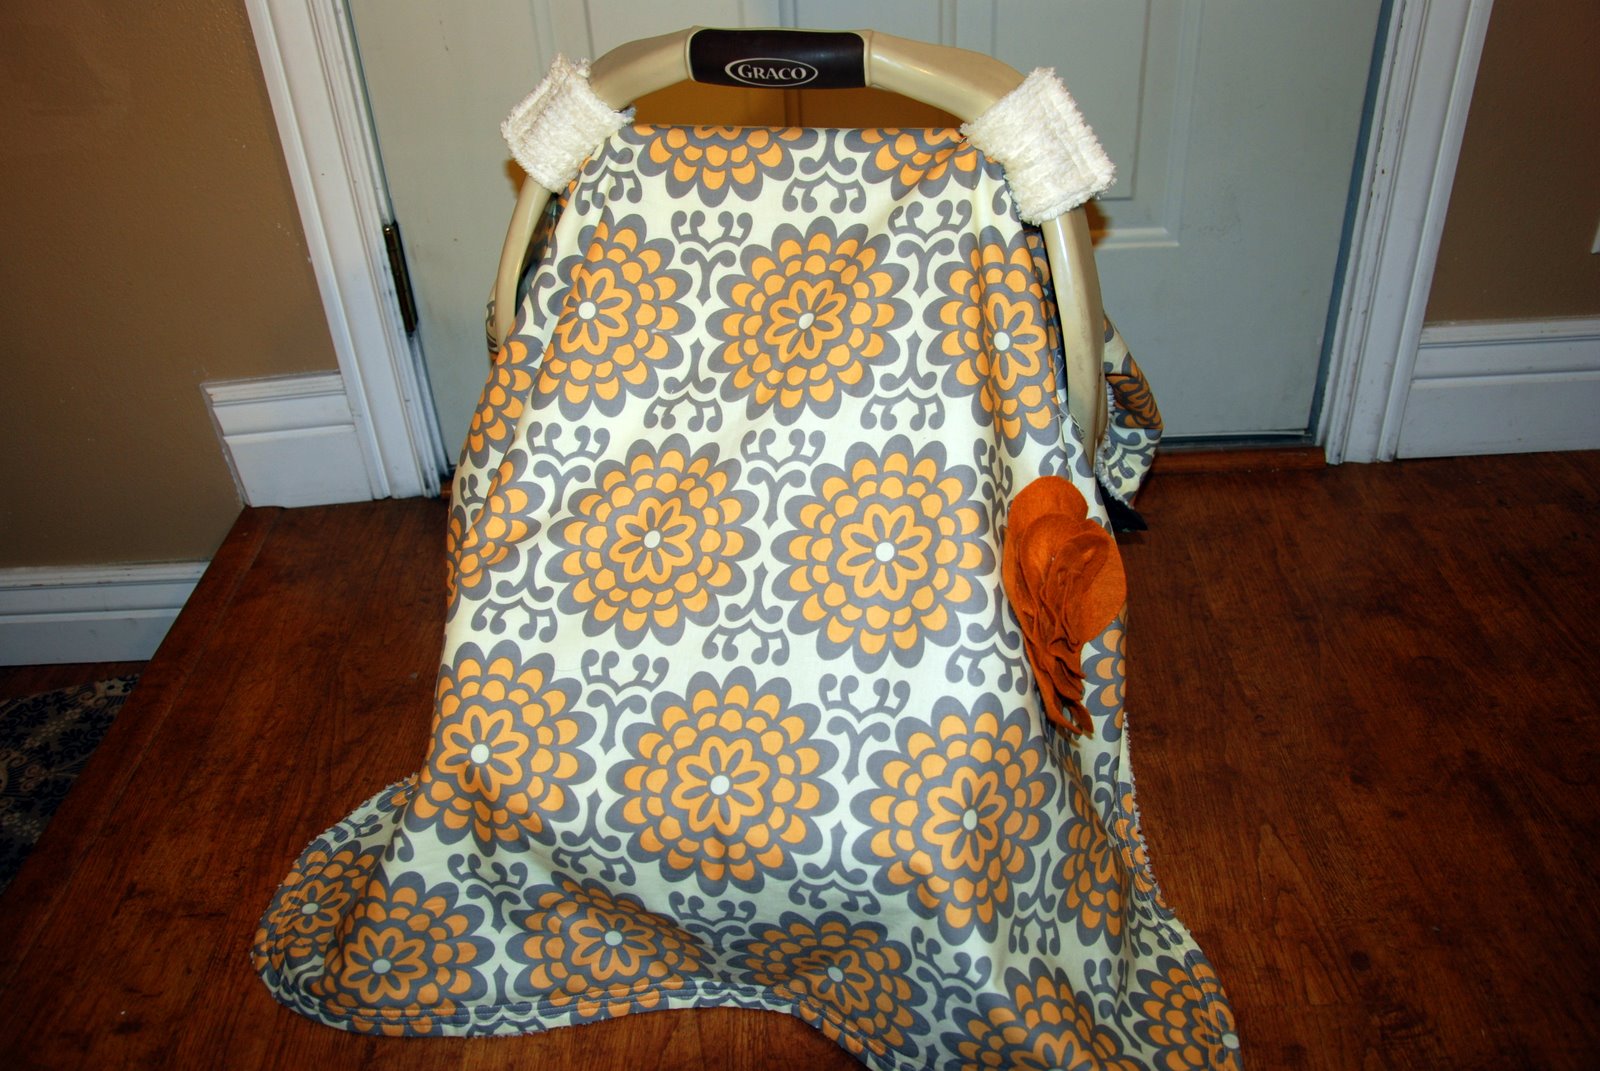
Car Seat cover

add a strap
Nursing Cover

You will need: one yard of front fabric (I used cotton quilting fabric)
one yard of back fabric (I used Chenille)
scraps of wool felt-optional (for flower)
Velcro (the sew on kind, not the sticky kind, it will gunk up your machine)
basic sewing tools (thread, scissors, pins, etc)

Cut both pieces about 35 inches wide, give or take (forgive me, I decided to do the tutorial after finishing, so all my pictures are of the finished product, not during the process)


and about 43 inches long

using a bowl, plate, or something round, round the edges of your fabric
sew the flower on.  I used leftover felt from this and followed to same general steps, just making it smaller


then sew the two pieces together, wrong sides together, leaving a space for turning
turn right sides out and top stitch (I did three rounds of top stitch, because I liked the look of it.  You could do one or two)


now make the straps for attaching to the car seat

I sewed to rectangles of chenille together measuring about 3.5" by 7.5".  I sewed them right sides together, then turned them right side out and top stitched.  I repeated for the second strap.


Then I sewed Velcro on, so it could wrap around the car seat handle.  Make sure you place the Velcro on opposite sides, so it can wrap flat

it will Velcro closed like this

Then I sewed the straps on (I did two seams down the center to attach each strap)

if you enlarge this picture, you will see the straps are about 13" down from the top
and about 21 inches up from the bottom (yours do not have to be exact)

place them about 10" in on either side

and about 8 inches apart

now make the strap, for the nursing cover


I sewed two rectangles right sides together, measuring 25.5"x3.5" and turned them right sides out.  Then I top stitched around

now you are done

if you feel inclined, embellish a cute burp cloth to go with it (I just used scrap fabric, some leftover lace hem tape, and some lace.  The lace came on a spool and so it already had a tendency to roll.  I just stared a circle on the outside, and rolled it in to the center)
Did you know that  My Vinyl Designer offers FREE downloads of some of their designs?  Go check them out!!
My Vinyl Designer Modern Art for the Home

Friday, April 22, 2011

Flower Rag Quilt Blanket

I am so excited to be here today! I am the author of A Vision to Remember. I also have my own etsy shop, where I sell many of my creations. I am a stay at home mom of 2 awesome girls and one dog. They are my inspiration for sure. Everything that I have made has been for them in some way.

Here are a couple of things that I have made over at my blog:

I love making rag quilts. I sell many in my etsy shop, but this pattern is available for download on my blog here.


This was a fun pleated headband that I made for myself (one of the few times that I craft for myself, if you know what I mean :)


I also made this fun Ribbon skirt for my daughter (Part 1, Part 2)

I also have many other tutorials on my blog. Make sure to stop by and check them out.


I also have my own Etsy shop. There I sell rag quilts, car seat tents, and lots of patterns. Some of the patterns I sell are rag quilts, belly band, and fabric flowers.


Thanks again for swapping blogs with me and make sure to stop by tomorrow and link up to Check ME Out Saturday Link Party Have a great day!

Monday, April 4, 2011

Blanket Tutorial - Crochet edge blanket

Remember when I shared this blanket I received? 
Isn't it pretty?   Here take a closer look.

Ok.  Where to start.  I love the colors.  I love the fabric.  I love the edges.  The edges...want to know how?  Here's Abbie to show you!


Several years ago my mother taught me how to crochet around the edges of flannel. When she came to visit me from Utah she brought along several burp cloths that had holes already punched near the edges that made it quick and easy to crochet. I live in Wisconsin and have not found any local way to acquire similar flannel blankets or burp cloths or anyone who has the machine and is able to do it for me. So I decided to try to come up with my own way of doing it. I also decided to try on calico fabric instead of flannel because for some things I like the look and feel of calico better. After some trial and error I found a way to put holes into the fabric that works well enough. One advantage to this method is that you don't see the holes in the final product, although the crocheting does go slightly slower. Here are the steps to make a blanket similar to this one:
1. Cut two pieces of fabric the size you would like the blanket to be, plus ½-inch extra.
2. With right sides together, sew around all four edges of your fabric with a ¼-inch seam allowance, leaving enough space to turn right-side out.
3. Turn right side out, hand stitch the opening closed and press the edges flat.
4. Using a wing needle and no thread in your machine, sew around all four edges with the longest stitch setting on your machine and slightly further than ¼-inch from the edge. A wing needle has metal flanges extending to the right and left of the needle. When the needle goes through the fabric, the wings push the yarns of the fabric to the sides, creating holes.
5. For the first round of crocheting, use a small crochet hook (about a size 8) to be able to get in and out of the little holes. Starting anywhere ch 1, sc in the same hole, and in each hole around. When you have finished all four edges, join the last sc with a slip st to the first sc.
6. Use a larger crochet hook, about a size 5, for the rest of your desired crocheting pattern. I used a copyrighted pattern called Vera's Shell Stitch so am not able to share it.


Thank you so much Abbie not only for the blanket for teaching me how to make one myself!!

Monday, March 21, 2011

Ballerina Blanket Tutorial

One great thing about blogging is meeting new friends.  Stephanie from Full of Great Ideas is such a sweet gal and super creative.  You def. have to check out her blog!  I love it!  And I love this blanket she made.  It's so super sweet!  Thanks for sharing today Stephanie!! :)

My daughter was invited to her best friend's 8th birthday party. Her friend is an amazing ballerina and my daughter really wanted to make her a blanket with a ballerina on it. I knew there was no way I could make a ballerina but I came up with an idea that I am very proud of and I think is absolutely beautiful.

I used the same technique as my personalized fleece blankets to make this. I purchased the large deep pink coral fleece blanket (double bed size) and 1yard of tulle. I had black felt, pink fleece, pink ribbon, Velcro circles and thread in light pink, deep pink (to match the blanket) and black on hand. Total cost $5 for the blanket (on clearance) and $6 for the tulle.

I started by printing off some images of a tutu and body form to be inspired from. I first cut out of black felt the bust of the body form, then the post and the feet. Make sure to prewash the felt because the color can transfer.
Once I was happy with the dress form, I used that as the shape to cut the bodysuit. I didn't want the top to be too low cut since this is a gift for an 8 year old girl so I made just a small 'v' shape. I used a wide light pink ribbon (same as the slippers) to make straps on the shoulder.

I decided to remove the black felt from behind the bodysuit so that it was quicker to sew. This is optional.
I placed all the pieces on the blanket to determine where I wanted the exactly. I then lightly glued the fabric down onto the blanket using a fabric glue that dries clear. I start with the black pieces first by pulling one side back and gluing it. This allows you to glue it down without having to move the entire piece.
 
Once this was drying, I started to work on the ballet slippers. For these I simply printed off a clip art image that was resized (approximately 7 1/2 long) to be in proportion to the bodysuit . I then cut out the shape of the slippers in light pink fleece and sewed a straight stitch over the inner lines to make it look like it had an opening for a foot.
 I ripped off the paper and did a tight zig-zag stitch over the straight stitch to create a bold accent line.
 
 
I cut two pieces of ribbon to the length I wanted to make the ties for the slippers (I lightly heated the ends of the ribbon so they would not fray). I glued the ribbons and slippers on the blanket.

I create the girl's name in a Word file using a font that I like. I print off the letters and then cut them out of the light pink fleece. I glue these down in the exact spot I wanted them.

Next I focused on the tutu. I had 1 yard of tulle so I folded it in half length wise and did a basting stitch along the fold.
Pulling one tread from either end I gathered the tulle until it was the width of the waist of the dress. I then sewed a ribbon across the basting stitch to secure it.
Once the glue was dry, I did a zig-zag stitch around the dress form, name and the bodysuit. I always use the exact color of the blanket for the bobbin thread and match the upper thread with what I am sewing. I find this makes both the front and back of the blanket look nice.
(Back of fabric with matching thread.)
I attached the tutu to the dress with small Velcro circles. I thought it would be best that this could be removed for washing. Not 100% necessary but a nice to have.
One last look. Wow... I can't tell you how happy I am with this. Let's hope she loves it too :)

Told you!  Love it huh?  A-stinking-dorable.

Make sure to check out My Vinyl Designer for all your vinyl needs -- or just browse their massive project list for ideas!  You will find something you love!